Dental Light CRI: The Key to Shade Matching

Shade matching is one of the most patient-sensitive and visual procedures in dentistry. A mismatch can compromise the esthetics of even the most excellent restorations. So what’s the secret culprit behind a lot of these errors? It’s not your eyes—it’s your dental light. More specifically, it’s the CRI, or Color Rendering Index, of the light. If you’re still operating under low-CRI lighting, you could be setting yourself up for failure without even knowing it.
What Is CRI (Color Rendering Index)?
CRI means Color Rendering Index. It’s a measure of how well a light source displays the actual colors of things. The scale is from 0 to 100. A CRI of 100 is perfect color rendering, like with sunlight. In dentistry, you require perceiving subtle differences in enamel, dentin, and adjacent soft tissue. If your dental light lacks a sufficiently high CRI, these color nuances are lost or distorted. Why is this important? Because color is everything when matching composite shades, ceramic restorations, or selecting a shade tab. If the lighting is off, your whole match can be off—even if your eyes are trained and your technique is good.
How Low CRI Sabotages Your Shade Matching Process
Low CRI light is a real problem, particularly during esthetic procedures. Teeth may appear dull, flat, or the incorrect temperature under poor light. You believe you are seeing the correct hue—but you are not. Here’s how a low-CRI dental chair light works against you:
- Colors appear less true. Tooth shades don’t look as they actually are.
- Materials appear inconsistent. Resin, ceramic, and natural tooth enamel can reflect light unpredictably.
- Remakes occur. You select a shade in the operatory, but in natural light, it’s obviously incorrect. The lab remakes it. Time and money lost.
- Patient trust declines. Even a minor discrepancy can be highly noticeable—particularly in front teeth. This affects satisfaction and referrals.
No matter how advanced your training is, your outcomes will be compromised if your dental chair light is not revealing the true colors. The light can appear to be bright enough. However, if the CRI is low, the color information it provides to you is untrustworthy.
The High CRI Solution: Viewing Colors as They Really Are
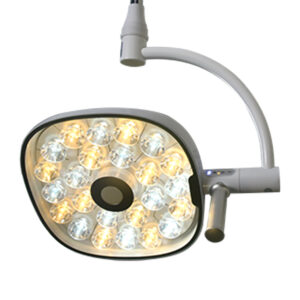
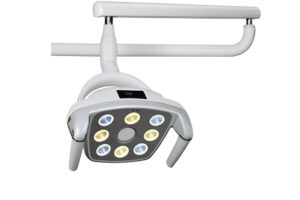
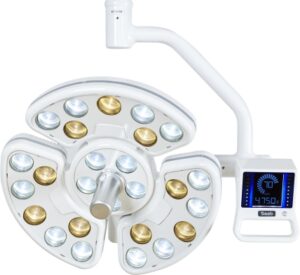
You do not have to alter your technique—you simply require a superior LED dental light. One with a high CRI rating, to be precise. Preferably, CRI should be above 90. This range of color rendering enables you to view what you’re actually dealing with. An LED dental light with high CRI differs in a number of important ways:
- Natural color representation. It will appear in the operatory very similar to the way it does in daylight.
- More predictable shade matching. You minimize the possibility of errors or second-guessing.
- Improved intraoral photography. Shade documentation appears more lifelike.
- Less eye fatigue. High-CRI lights are gentler on your eyes during lengthy cases.
Not every LED light has a high CRI. That’s why specs should be checked before purchasing. Some of the less expensive units skimp on color quality. Brightness might be present, but color accuracy will not be. Choosing the right dental light isn’t about bells and whistles. It’s about getting the color fidelity your work demands. Indeed—following is a more detailed version of your dental shade matching checklist with the same professional tone but with additional context and information for every step:
A Practical Checklist for Light-Assisted Shade Matching
Despite the best dental chair light, your own habits contribute significantly to the precision of shade matching. The following is a streamlined checklist for you to follow to gain consistent, dependable results whenever you match shades:
Check CRI Before You Start
Prior to any shade selection process, ensure your LED dental light boasts a Color Rendering Index (CRI) of 90 or above. High CRI indicates the light source will be able to display subtle color variation precisely, something that is essential to distinguish among close shades of teeth. If your light is of a lower CRI, upgrade—a CRI below 90 compromises vision and predisposes to a mismatch.
Use One Light Source Consistently
Changing light sources mid-procedure—from chair light to ambient room light, for example—can manipulate color perception based on variations in temperature, brightness, and spectral quality. Choose one color-correct, consistent light source and maintain it throughout the shade matching procedure. This provides a constant reference environment for your eyes.
Calibrate Color Temperature
Target a light source between 5000K to 5500K, which replicates natural daylight. This is the most neutral light condition to assess tooth color. Warmer lights (less than 5000K) will introduce yellow or red bias, whereas cooler lights (greater than 5500K) will cause shades to look too gray or blue. Color temperature calibration is particularly critical for anterior restorations, where esthetic expectations are greatest.
Neutralize the Environment
The colors around the patient—like clothing, lipstick, wall color, or even colorful bibs—can impart color reflections and influence your perception. To minimize visual noise, utilize neutral gray bibs, drape over bright clothing, and ask the patient to remove vibrant lipstick. You can also wear neutral gray eyewear or place a gray card adjacent to the patient’s face to help your eyes adapt more consistently.
Compare Quickly
Your eyes also have a limited time for comparative color accuracy before they fatigue. Decide on the shade within 5 to 7 seconds of gazing at the tooth and shade tab. Over-staring or analyzing too much can desensitize you to the minute color variations and cause errors. Rest your eyes by gazing at a neutral background, if necessary, before taking a second look.
Take Shade Photographs
Once you have chosen the shade, record a good-quality digital photograph with the chosen shade tab placed flat against the tooth, in your calibrated dental light. Ensure that there is no shadowing or glare. Such photos are handy guides for dental laboratories, particularly if combined with written remarks regarding translucency, characterizations, or light conditions. A few clinicians even place a gray card within the image for post-processing calibration.
Augment with Cross-Verification If Required
In more complicated or esthetically challenging situations, it is beneficial to cross-validate your choice with a second approach—be that a digital shade scanner or having a colleague verify your decision. This multi-layered approach minimizes the possibility of error and increases confidence in the final decision.
Conclusion: From Guesswork to Guarantee
Shade matching does not need to be tense or hit-or-miss. If you have been having trouble with mismatches, it is not necessarily your fault—it could be your dental light. More specifically, it could be the CRI that’s letting you down. Changing to a high-CRI LED dental light is perhaps the simplest method of enhancing your esthetic results. It will not solve every dilemma, but it eliminates one big variable: inadequate lighting. For cosmetic and restorative work, color accuracy isn’t optional—it’s required. And the light you use should meet that same standard.
High-CRI Dental Lighting: Frequently Asked Questions
Q1. Why Is Cri So Important When It Comes to Dental Lighting?
CRI indicates how accurately a light source renders actual colors. In dentistry, you’re making visual decisions all day—matching shades, assessing tissue health, or inspecting margins. With a high CRI, you can rely on what you’re seeing. With a low CRI, critical details are masked or pushed toward warmer or cooler tones, resulting in errors. Proper lighting minimizes remakes, saves time, and builds patient trust.
Q2. Can I Utilize Standard Led Bulbs for Shade Matching?
The majority of residential LED bulbs are not constructed for color-critical applications. Most have a CRI of 80 or less, which is not precise enough for dentistry. LED dental lights are specially made for clinical applications, with enhanced CRI and beam control. Working with an ordinary bulb compromises the accuracy of matches and the consistency of results.
Q3. How Can I Verify the Cri of My Existing Dental Light?
Look at the product specs or user guide. If not, contact the manufacturer. Older units or low-end lights do not tout CRI if it is low. If your device does not have 90+, it is time to upgrade. CRI is as vital as brightness in contemporary dental chair lights.
Q4. Do Dental Laboratories Utilize High Cri Lighting as Well?
Yes, most laboratories also depend on high CRI lighting for shade fabrication and color verification. But if your match is incorrect to begin with, even a perfect lab light won’t assist. It’s optimal when both clinic and laboratory utilize consistent, high-quality lighting to prevent errors and enhance communication.
Q5. Can Lighting Influence Other Aspects of Dental Care?
For sure. Aside from shade matching, light influences margin detection, tissue assessment, and even your posture. An inadequate dental light may lead to glare, shadows, or strain, particularly in posterior procedures. Good lighting is an investment that benefits every aspect of your clinical workflow—not just cosmetics.
About the Author


