Integrating Sterilizers with Your Chair Workflow

The Hidden Bottleneck: Optimizing Your Chair-to-Sterilizer Workflow
A seamless workflow between the dental chair and the sterilizer is the heartbeat of an efficient, safe, and profitable dental practice. When this process is optimized, patient turnover is smooth, staff stress is reduced, and the risk of cross-contamination is minimized. However, when it’s inefficient, it becomes a significant bottleneck, causing frustrating delays and compromising safety protocols. This article provides a definitive guide to integrating your autoclave process with chair-side operations, ensuring a sterile instrument flow that meets regulatory standards and boosts your clinic’s productivity.
The core principle is simple: every minute an instrument spends in transit or waiting for a cycle is a minute of lost production time. By designing a workflow grounded in established quality management principles, you can transform your sterilization process from a cost center into a competitive advantage.
Foundational Principles of a Lean Sterile Workflow
Before rearranging equipment, it’s crucial to understand the principles that govern an effective sterile workflow. These concepts are rooted in industrial efficiency and mandated by health regulations, ensuring both safety and speed.
The Unidirectional Path: From Contaminated to Sterile
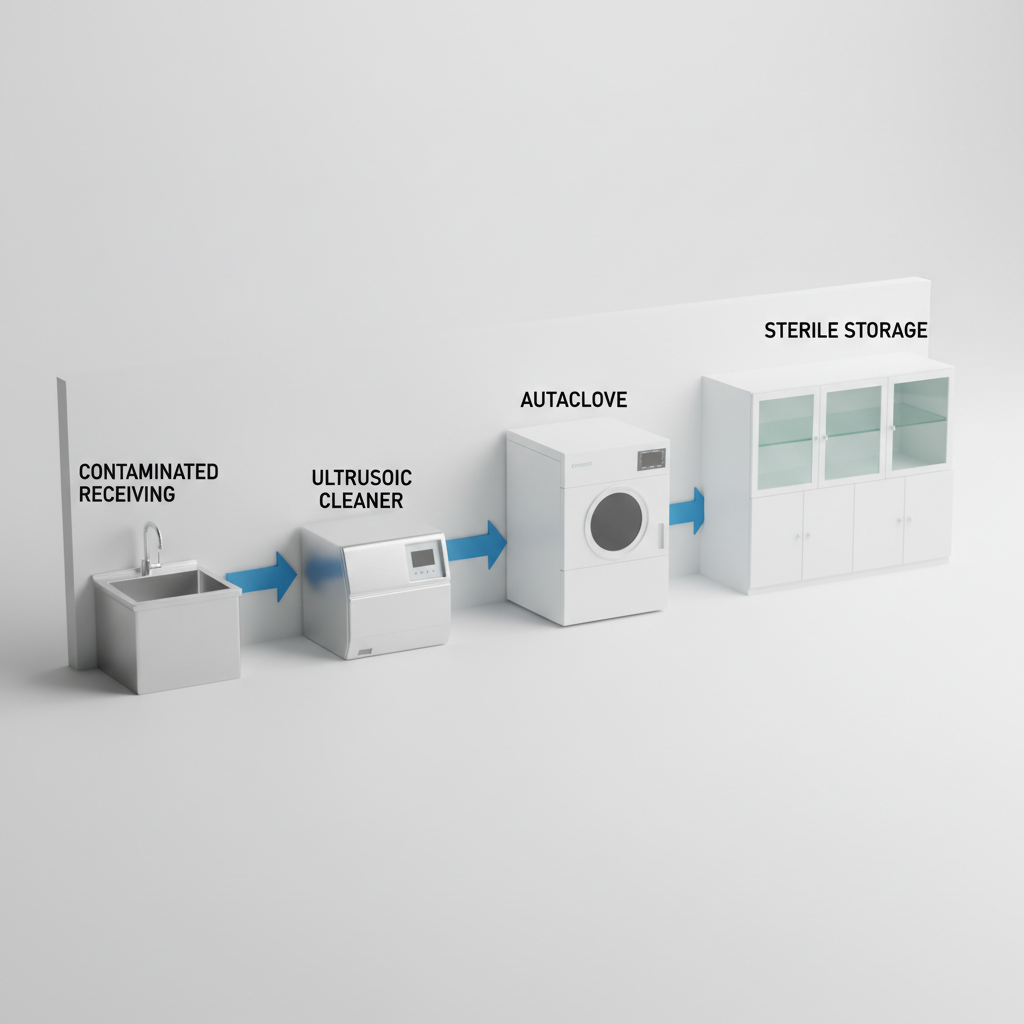
The single most important principle in sterile processing is creating a one-way path for instruments. This prevents any contact between contaminated and sterile items, eliminating a primary source of cross-contamination. The ideal flow follows a logical progression:
- Contaminated Zone: Instruments arrive directly from the operatory and are placed in a dedicated decontamination sink.
- Cleaning & Packaging: Instruments are cleaned, dried, and packaged for sterilization.
- Sterilization Zone: Packaged instruments are loaded into the autoclave.
- Sterile Storage: After the cycle, instruments are moved to a designated clean storage area, ready for use.
This linear path should be physically enforced with visual separators, such as colored lines on the floor or countertop dividers, ensuring staff members do not backtrack with contaminated items into a clean zone.
Regulatory Frameworks as Your Blueprint
A well-designed workflow is not just about efficiency; it’s about compliance. International standards provide a blueprint for creating robust quality management systems. For instance, ISO 13485:2016 specifies the requirements for a quality management system where an organization needs to demonstrate its ability to provide medical devices and related services that consistently meet customer and applicable regulatory requirements. Adhering to these principles ensures your processes are defensible, repeatable, and focused on patient safety. Similarly, in the United States, the FDA’s 21 CFR Part 820 outlines quality system regulations that cover the design, manufacturing, and packaging of medical devices, including sterilizers.
Debunking a Common Misconception: Bigger Isn’t Always Better
A frequent myth in clinic design is that a single, large, centralized sterilizer is the most efficient solution. In reality, this often creates a bottleneck, where multiple operatories are waiting on a single machine. A more effective approach, especially for busy clinics, is to use multiple mid-sized autoclaves. A practical heuristic is to aim for one mid-size autoclave for every two to four operatories. High-turnover practices focusing on hygiene or basic restorative cases may even require a one-to-one ratio to keep pace with demand. This distributed model provides redundancy and allows for staggered loads, ensuring a continuous supply of sterile instruments.
Optimizing Your Sterilization Zone Layout
The physical arrangement of your sterilization area is as important as the equipment within it. A poorly designed space can undermine the most diligent staff, while a logical layout makes the correct workflow feel effortless.
The “Sterilization Triangle”: Sink, Sterilizer, and Storage
The core of your sterilization area should be a compact “triangle” connecting the decontamination sink, the autoclave, and the sterile storage zone. To minimize transit time and reduce the risk of accidental contamination, the sterilizer should be located within a 3 to 6-meter walk from the operatories. For maximum efficiency, an adjacent sterilization room with a pass-through window is an excellent design choice. This layout keeps the noise and heat of the autoclave contained while providing immediate access to sterile instruments.
A Practical Model: Workflow in a High-Turnover Clinic
Consider a four-operatory clinic that sees a high volume of patients for routine procedures. Instead of one large autoclave, they install two mid-sized units.
- Instrument Sets: They use color-coded trays designed for a 15-minute turnover time.
- Workflow: As a patient leaves Operatory 1, the contaminated tray is taken to the sterilization bay. While that tray begins its cycle in Autoclave A, the dental assistant can prepare the room with a sterile tray that just finished its cycle in Autoclave B.
- Staggered Cycles: By staggering the cycles between the two machines, they ensure a sterile set of instruments is available every 15-20 minutes, perfectly matching the time it takes to clean and prepare the operatory for the next patient. This system virtually eliminates downtime spent waiting for instruments.
This approach demonstrates how matching sterilization capacity to chair-side demand is critical for maintaining patient flow.
Instrument Management and Load Optimization
How you manage your instruments and load the autoclave has a direct impact on cycle effectiveness and longevity of your equipment. Proper technique ensures complete steam penetration and prevents failed cycles that disrupt your schedule.
Designing Procedure-Specific Instrument Sets
Standardize your instrument trays for different types of procedures. This not only speeds up chair-side setup but also optimizes sterilization.
| Procedure Type | Target Turnover Time | Instrument Set Design |
|---|---|---|
| Basic Hygiene/Exam | ≤ 15-20 minutes | Minimalist set designed for short, standard autoclave cycles. |
| Restorative (Fillings) | ≤ 20 minutes | Includes all necessary instruments for a single procedure. |
| Surgical/Implant | 30-45 minutes | Comprehensive set requiring longer, specialized cycles (e.g., for wrapped kits). |
By creating these modular, purpose-built sets, you avoid sterilizing unnecessary instruments and can perfectly match the tray to the required cycle time.
The 80% Rule and Other Loading Best Practices
One of the most common mistakes in sterilization is overloading the autoclave chamber. This prevents steam from penetrating the load evenly, which can lead to failed cycles. As a rule, never fill the chamber more than 80% of its capacity.
Checklist for an Effective Sterilization Cycle
To ensure consistent results, follow this checklist for every cycle:
- [ ] All instruments have been thoroughly cleaned and dried before packaging.
- [ ] Hinged instruments (e.g., forceps) are left in the open position.
- [ ] The chamber is loaded to no more than 80% capacity to allow for steam circulation.
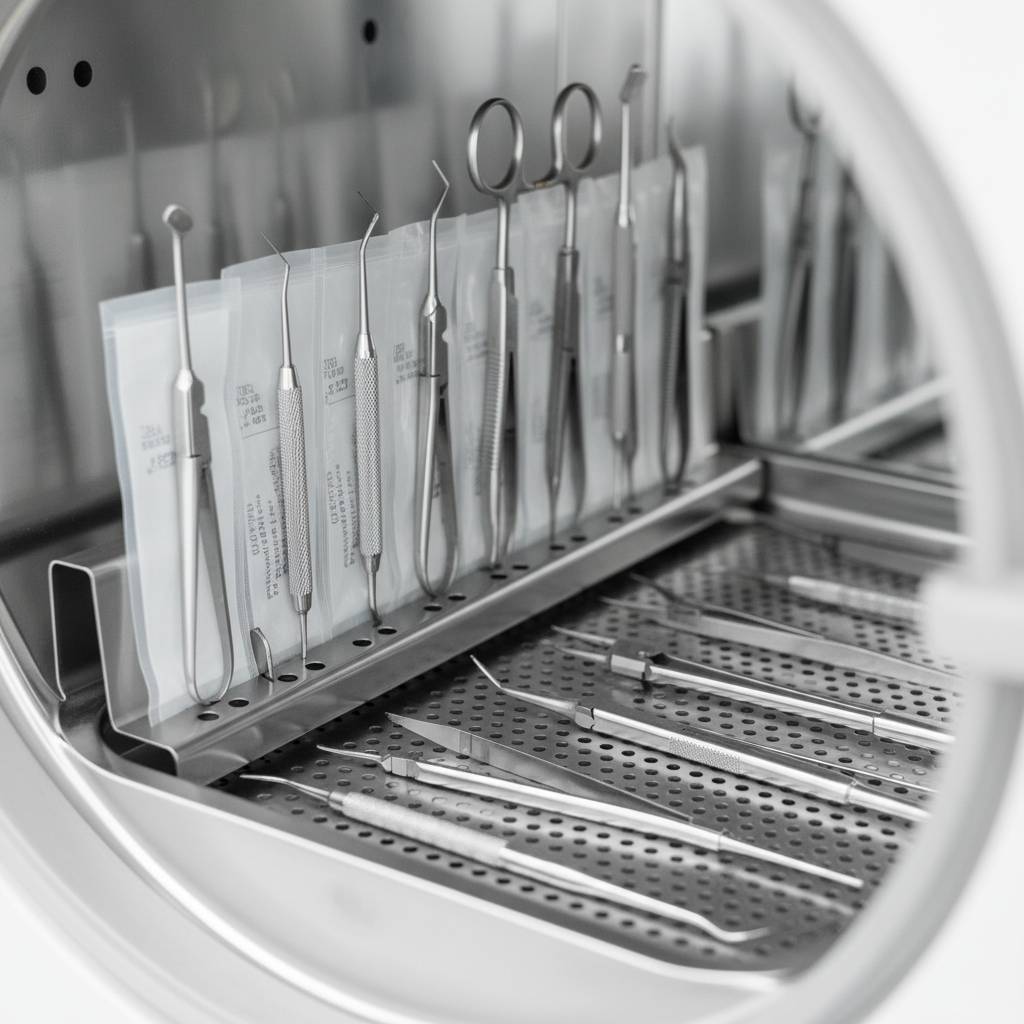
- [ ] Sterilization pouches are placed on their edge or in racks, ensuring they don’t overlap.
- [ ] The correct cycle has been selected based on the load contents (e.g., wrapped, unwrapped).
- [ ] A daily Bowie-Dick test has been performed (for vacuum-assisted autoclaves).
- [ ] A chemical indicator is included in every pack, and a biological indicator is included according to your scheduled testing protocol.
Validation, Maintenance, and Ensuring Compliance
An effective sterilization workflow does not end when the cycle is complete. Ongoing validation, routine maintenance, and meticulous record-keeping are essential for ensuring patient safety and meeting regulatory requirements, such as those for CE Marking on equipment sold within the European Union.
Pro Tip: Go Beyond Basic Cycle Verification
Modern autoclaves log cycle parameters, but this data alone doesn’t prove sterility. True validation comes from a three-tiered approach:
- Physical Monitoring: Verifying the cycle time, temperature, and pressure readouts on the machine for every load.
- Chemical Indicators: Using indicator strips or tape on every package to show it has been exposed to the conditions needed for sterilization.
- Biological Indicators (Spore Tests): Using vials of highly resistant spores (e.g., Geobacillus stearothermophilus) at least weekly to prove the sterilization process is lethal to microorganisms. This is the highest level of sterility assurance.
The Importance of a Maintenance and Validation Log
Keep a detailed logbook for each sterilizer. This log should include daily Bowie-Dick test results, weekly spore test results, and a record of every maintenance and service call. This documentation is not just good practice; it is a critical requirement for regulatory compliance and provides a crucial record in the event of an audit or patient safety inquiry. A proactive maintenance schedule, tracked in the log, helps prevent unexpected equipment failure and costly downtime. For clinics in any setting, prioritizing robust, low-maintenance autoclaves reduces operational risks and ensures consistent performance.
Key Takeaways
Integrating your sterilizer with your chair workflow is a systematic process that pays significant dividends in efficiency, safety, and profitability. A successful system is built on more than just a machine; it is a combination of intelligent layout, disciplined processes, and a commitment to compliance.
By focusing on these key pillars—a unidirectional workflow, a strategically located sterilization zone, procedure-specific instrument sets, and rigorous validation—you can eliminate operational bottlenecks and create a clinical environment that runs smoothly and safely. This optimization allows you to focus on what matters most: providing excellent patient care.
Disclaimer: This article is for informational purposes only and does not constitute professional medical or regulatory advice. Dental clinics should always consult with infection control specialists and adhere to all local, state, and federal regulations regarding instrument sterilization and facility design.
References:
- ISO 13485:2016 – Medical devices — Quality management systems — Requirements for regulatory purposes. https://www.iso.org/standard/59752.html
- U.S. Food & Drug Administration (FDA) 21 CFR Part 820 – Quality System Regulation. https://www.fda.gov/regulatory-information/search-fda-guidance-documents/quality-system-regulation-medical-devices
- European Commission – CE Marking. https://ec.europa.eu/growth/single-market/ce-marking_en
About the Author


