Smart Tech Upgrades for Your Existing Dental Chair

A Modern Practice Doesn’t Always Need a New Chair
A full chair replacement isn’t the only way to modernize your practice. For budget-conscious clinics and growing practices, a complete overhaul can represent a significant, and sometimes unnecessary, capital expense. The good news is that you can often bring the core benefits of digital dentistry to your current setup through strategic, cost-effective technology add-ons. This guide provides a practical roadmap for upgrading your existing dental chairs, maximizing your initial investment while enhancing both your workflow and the patient experience.
Before embarking on any upgrade, it’s crucial to ground your project in a framework of safety and compliance. Any modification to medical equipment must be approached methodically to maintain its integrity. This means ensuring that all components and installation practices adhere to recognized quality management standards, such as those outlined in ISO 13485:2016, which governs the quality systems for medical devices.
The Strategic Value of Incremental Upgrades
Thinking of your dental chair as a static piece of equipment is a missed opportunity. Instead, view it as a foundational platform that can evolve with your practice. Incremental upgrades allow you to adopt new technologies at your own pace, aligning with your budget and clinical needs.
Extending the Life of Your Core Asset
A well-maintained dental chair is a durable asset. Its primary function—patient positioning—doesn’t change, even as digital technology advances. By retrofitting your chair with new tools, you extend its useful life and improve the return on your original investment. This approach allows you to allocate funds toward technologies that directly impact diagnostics and patient care, rather than on redundant mechanical hardware. For a deeper look into the long-term financial planning of dental equipment, our A Dental Chair TCO Guide for New & Growing Dental Clinics offers valuable insights.
Enhancing Workflow and the Patient Experience
Technology integration is about more than just having the latest gadgets; it’s about creating a more efficient and engaging clinical environment. Adding a chairside monitor for displaying intraoral camera feeds, for instance, transforms the patient consultation. It turns a passive explanation into an interactive co-diagnosis, which can significantly improve case acceptance. As we’ve explored in The ROI of Patient Comfort in Your Dental Practice, when patients feel informed and involved, their trust and satisfaction grow.
Debunking a Common Myth: “Only New ‘Smart’ Chairs Can Be Integrated”
A frequent misconception is that you need to buy a brand-new, fully integrated “smart” chair to create a digital workflow. In my experience, this is rarely the case. Most high-quality dental chairs, regardless of age, are built with robust structural frames. These frames are more than capable of supporting modern peripherals. The key isn’t the chair’s manufacturing date but a methodical integration process. With universal mounting hardware and careful planning, a ten-year-old chair can be just as functional as a new one, often with better ergonomics because you can customize the placement to your specific needs.
Core Technology Add-Ons for a Digital Workflow
Focus on upgrades that deliver the highest clinical value. For most practices, this means improving visualization and diagnostics.
1. Intraoral Cameras
If you make only one upgrade, let it be an intraoral camera. These small, handheld wands are the gateway to digital dentistry, allowing you to capture clear, magnified images of a patient’s oral cavity.
- Clinical Benefits: They are invaluable for patient education, documenting conditions for insurance claims, and tracking treatment progress over time.
- Integration Insights: When mounting an intraoral camera boom, I always plan for a working reach of 30–60 cm to ensure it can be positioned easily without straining. Cable management is also critical; ensure the cable is at least 2.5–3 meters long to allow for a full range of motion without pulling or snagging.
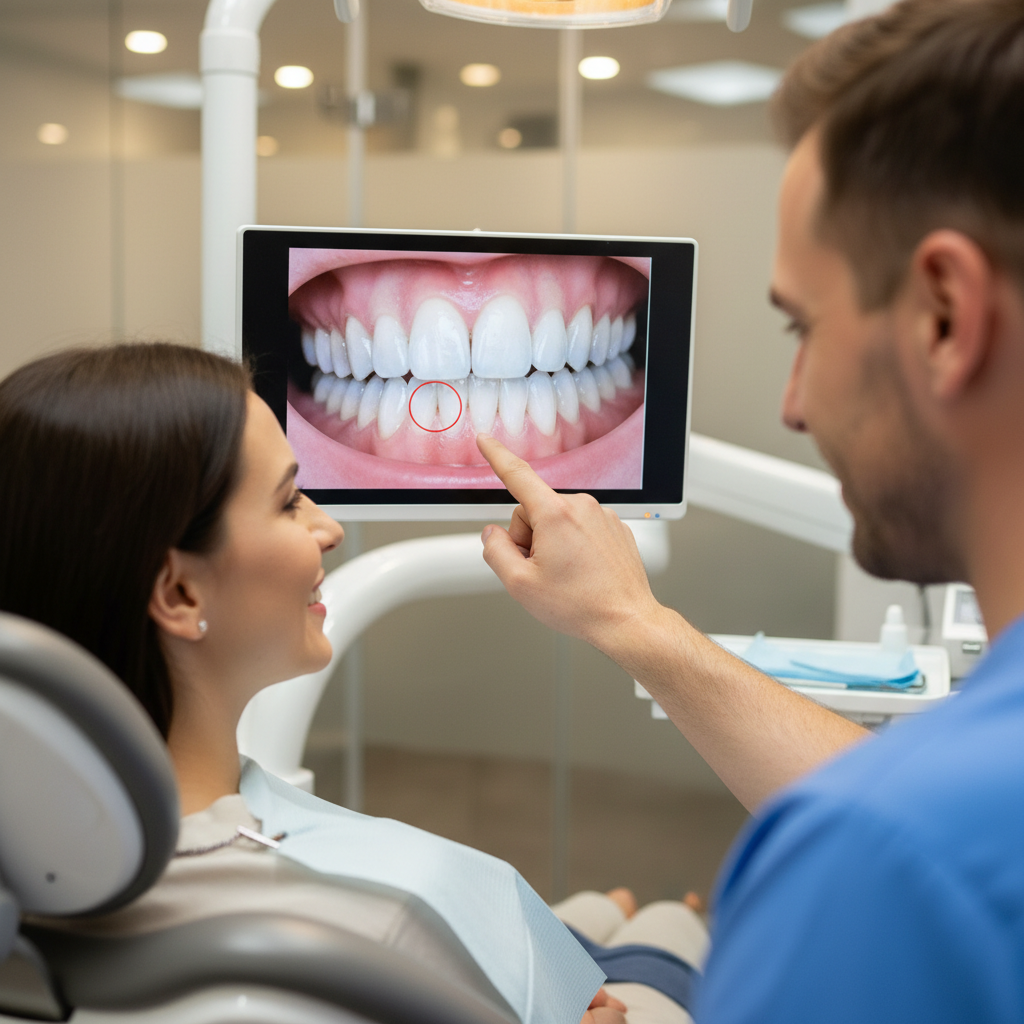
2. Chairside Monitors
A monitor turns the images from your intraoral camera into a powerful consultation tool. It can also be used to display X-rays, treatment plans, or even patient entertainment.
- Clinical Benefits: Monitors facilitate clearer communication, leading to higher case acceptance and improved patient understanding. They also reinforce the perception of your practice as modern and professional.
- Integration Insights: This is where many installations go wrong. A common mistake is attaching the monitor arm to a cosmetic panel instead of the chair’s structural frame. I’ve seen monitor arms fail because they weren’t anchored to a solid point. Always verify the mounting points. A typical monitor arm needs to support 5–8 kg and have a reach of 40–60 cm. For more on achieving a balanced setup, see our guide on Achieving Practitioner Ergonomics on a Clinic Budget.
3. LED Operating Lights
Upgrading from an older halogen light to an LED model offers significant advantages in visibility, energy efficiency, and comfort.
- Clinical Benefits: LEDs produce a clearer, more color-accurate light field with less heat, improving comfort for both the patient and the practitioner during long procedures.
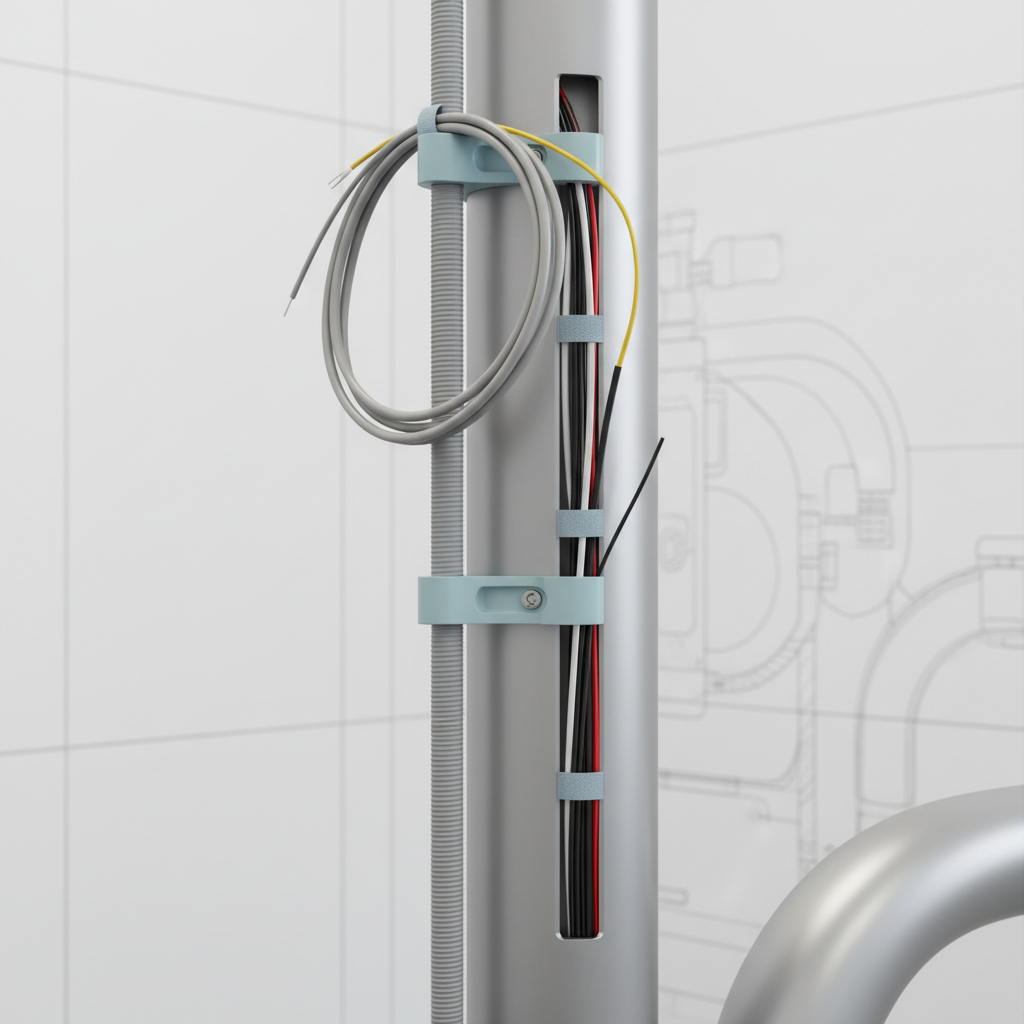
- Integration Insights: When installing new electronics like LED lights, it’s vital to consider electromagnetic interference (EMI). A lesson I learned early on is to keep low-voltage data cables and mains power cables separated by at least 5–10 cm. This prevents electrical noise from degrading the performance of your other digital equipment. Furthermore, ensure any new electrical component is compliant with regional standards, such as having the CE Marking in Europe, which certifies it meets health, safety, and environmental protection standards.
The Integration Masterclass: A Step-by-Step Guide
A successful upgrade project is 90% planning and 10% installation. Hasty work leads to costly failures. Follow these steps to ensure a smooth, reliable, and safe integration.
| Step | Action Item | Key Considerations & Rationale |
|---|---|---|
| 1. Assess & Plan | Measure mounting geometry, static loads, and clearances. | “Measure twice, order once.” Confirm that the physical space and structural capacity exist before purchasing any hardware. Check manufacturer specs for weight limits. |
| 2. Verify Structure | Identify and use the chair’s structural frame for all attachments. | Cosmetic panels and plastic shrouds are not designed to bear weight. Attaching equipment to them is a primary cause of failure. Look for solid metal anchor points. |
| 3. Balance Weight | Keep the total added mass to less than 10–15% of the movable assembly. | Exceeding this can overload the chair’s actuators and motors, leading to premature wear or failure. Always consult the chair’s technical specifications if available. |
| 4. Manage Cables | Plan cable runs with service loops (2.5–3 m lengths) and separate power/data lines. | Service loops provide slack for movement and maintenance. Separating cables by 5–10 cm prevents EMI, which can cause monitor flicker or data corruption. |
| 5. Preserve Infection Control | Route cables away from sterilization zones and use medical-grade materials. | Cables and mounts must not interfere with standard cleaning protocols. All surfaces should withstand common disinfectants, a principle aligned with the FDA’s Quality System Regulation. |
| 6. Validate Ergonomics | Prototype the setup with clinicians over 1–2 weeks. | Simulate 30–50 common procedures to test reach, sightlines, and workflow impact. What looks good on paper may be awkward in practice. Adjust as needed before finalizing. |
Common Pitfalls and How to Avoid Them
I’ve been called in to fix many upgrade projects that went wrong. Here are the most common mistakes and how you can avoid them.
-
Mistake #1: Assuming Universal Mounting Interfaces. Not all VESA mounts are the same, and proprietary brackets are common. Solution: Always get the mounting pattern specifications from the monitor and mount manufacturers before ordering. If possible, request a template.
-
Mistake #2: Ignoring Maintenance Access. Boxing in cables and connections makes future repairs or replacements a nightmare. Solution: Use removable panels or flexible conduits. Always label both ends of every cable to simplify troubleshooting.
-
Mistake #3: Underestimating Electrical Interference. Adding multiple digital devices without proper cable management can create a host of mysterious electronic “gremlins.” Solution: Strictly adhere to the 5–10 cm separation rule for power and data cables. Use shielded cables where possible.
-
Mistake #4: Overloading the Chair’s Movement System. Adding a heavy monitor and arm can strain the chair’s lift and tilt motors if not accounted for. Solution: Follow the 10-15% rule for added mass. If you are close to the limit, consult a certified technician to assess the actuator’s capacity.
To ensure long-term reliability, create a simple post-installation checklist. Document the serial numbers and warranty information for each add-on, label all cable terminations, and keep a small inventory of spare parts for wear items like mounting hardware and flexible conduits.
Wrapping Up: A Future-Proof Practice on Your Terms
Modernizing your dental practice is not an all-or-nothing proposition. By taking a strategic and methodical approach to upgrading your existing dental chairs, you can unlock the benefits of digital dentistry without the financial strain of a complete overhaul.
Successful integration hinges on careful planning, a deep respect for structural and electrical principles, and a commitment to maintaining infection control and ergonomic workflows. By focusing on high-value additions like intraoral cameras and monitors, and by following a disciplined installation process, you can enhance your diagnostic capabilities, improve the patient experience, and extend the productive life of your most critical assets.
Disclaimer: This article is for informational purposes only and does not constitute professional engineering or medical device installation advice. All modifications to medical equipment should be performed by qualified, certified technicians in accordance with manufacturer guidelines and local regulations. Always consult a professional before making changes to your clinical equipment, especially if you have questions regarding safety, compliance, or structural integrity.
References
About the Author


