Common Lift System Issues & How to Fix Them

Is your dental chair lift jerky, slow, or unresponsive? This guide covers common problems in both hydraulic and electromechanical systems and provides straightforward troubleshooting steps.
A fully functional dental chair is the cornerstone of an efficient clinic. When the lift system fails, it disrupts schedules, frustrates staff, and can erode patient confidence. Before you assume a costly motor failure or a complex electrical issue, it’s important to know that many lift problems stem from simple, fixable causes. In my experience, a methodical approach to diagnostics can save hours of downtime and significant expense.
This guide provides a technician-level framework for troubleshooting and resolving the most common issues in both hydraulic and electromechanical dental chair lifts. We will walk through a universal diagnostic checklist, dive into system-specific problems, and outline a preventive maintenance schedule to ensure long-term reliability. Following these steps can help you quickly distinguish between a minor adjustment and a problem requiring professional service, directly addressing the financial impact of dental chair downtime.
Comparing Dental Chair Lift Systems: Hydraulic vs. Electromechanical
Before diving into troubleshooting, it’s helpful to understand the type of lift system you’re working with. Most dental chairs use either a hydraulic or an electromechanical system to control vertical movement. Each has distinct characteristics, and understanding them is key to effective diagnosis.
| Feature | Hydraulic Lift System | Electromechanical Lift System |
|---|---|---|
| Mechanism | Uses incompressible fluid (oil) pressurized by a pump to move a piston. | Uses a motor-driven screw or belt to raise and lower the chair. |
| Movement | Exceptionally smooth and quiet vertical and tilting motions. | Smooth, but can produce more audible operational noise. |
| Reliability | Highly reliable with few moving parts. Prone to leaks over time. | Generally reliable, but has more moving parts (motor, brushes, gears) that can wear out. |
| Maintenance | Requires periodic fluid level checks, filter changes, and bleeding of air from lines. | Requires regular inspection of motor brushes, lubrication of drive screws, and checking electrical connections. |
| Common Issues | Slow or sinking movement due to fluid leaks or air in the lines. | Jerky motion from worn motor brushes, or total failure from limit switch or controller issues. |
| Cost Profile | Generally lower initial cost and simpler to service for basic issues. | Can have a higher upfront cost, with motor or controller replacement being more expensive. |
While the choice between systems often comes down to specific clinic needs, balancing affordability and long-term durability is a key consideration. Now, let’s move on to a universal diagnostic approach that applies to both.
The Universal Diagnostic Checklist: Start Here for Any Lift Issue
From years of field service, I’ve learned that operators often jump to the wrong conclusion, assuming a major component has failed. A common mistake is suspecting motor failure when the real culprit is a faulty limit switch or a lack of sufficient compressed air supply. To avoid this, always follow a structured diagnostic sequence. Documenting the symptom, the date of the last maintenance, and any unusual events before the failure can reduce diagnostic time by 30-50%.
A Common Myth Debunked: The belief that lift system failures are almost always complex electrical problems is a persistent myth. In reality, a significant portion of “electrical” failures trace back to simple mechanical or supply issues, like loose fasteners, blocked air ports, or a tripped circuit breaker.
Follow this three-step process to systematically isolate the problem:
Step 1: Safety and Supply Checks
This first step resolves the majority of common issues and ensures a safe working environment. Adhering to these fundamental checks aligns with the principles of quality management systems outlined in standards like ISO 13485:2016, which mandate procedural discipline.
- Power Off and Lockout: Before any inspection, completely disconnect the chair from its power source. Use a lockout/tagout procedure if your clinic has one.
- Check the Power Source: Is the unit plugged in securely? Check the circuit breaker for the operatory. Test the outlet with another device to confirm it’s working.
- Inspect Power Cords: Look for any visible damage, kinks, or fraying on the main power cord and any foot pedal controllers.
- Check Fuses and Batteries: Consult the user manual to locate and inspect any user-serviceable fuses. If the chair has a battery backup or wireless controls, check the battery levels.
- Verify Air/Water Supply: Some chairs use compressed air for certain functions. Ensure the main air supply to the chair is on and at the correct pressure as specified by the manufacturer.
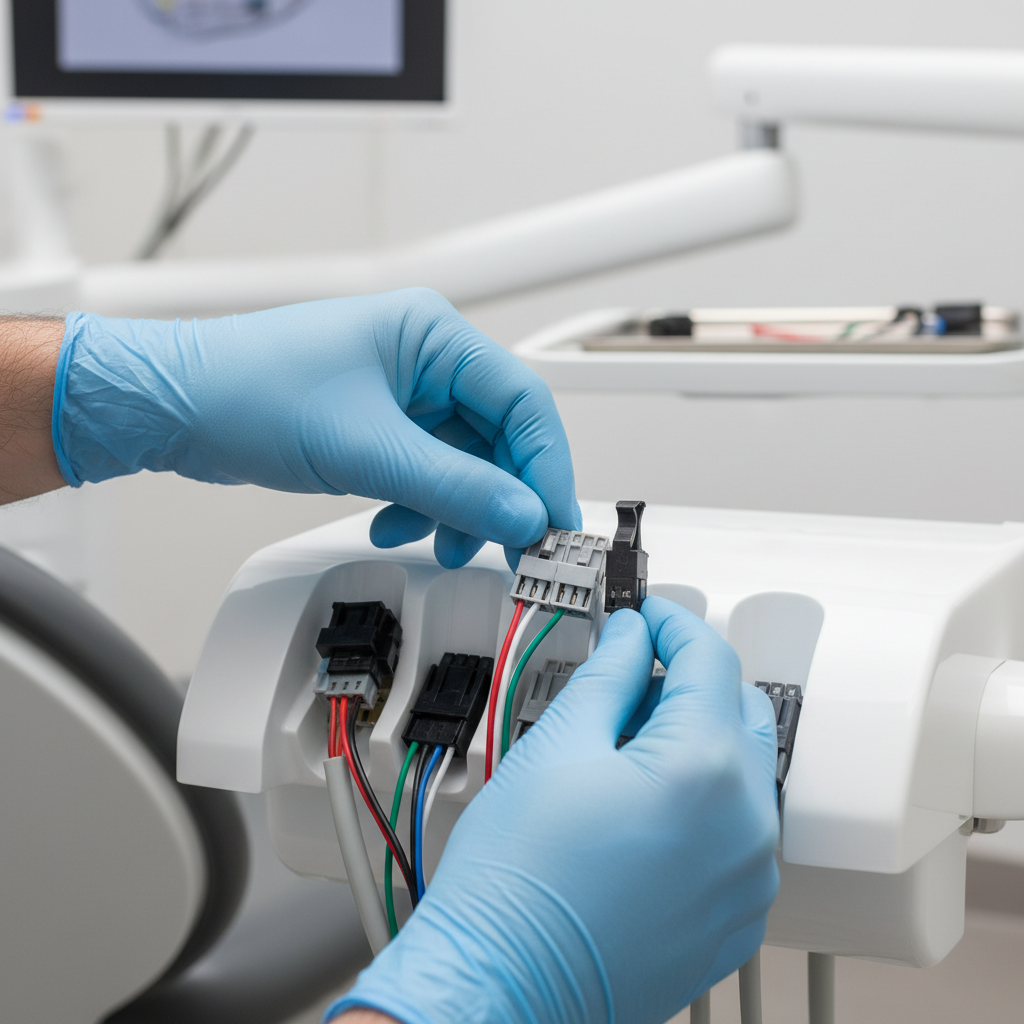
Step 2: Mechanical and Visual Inspection
Once supplies are confirmed, perform a thorough visual and tactile inspection of the chair’s base and lift mechanism.
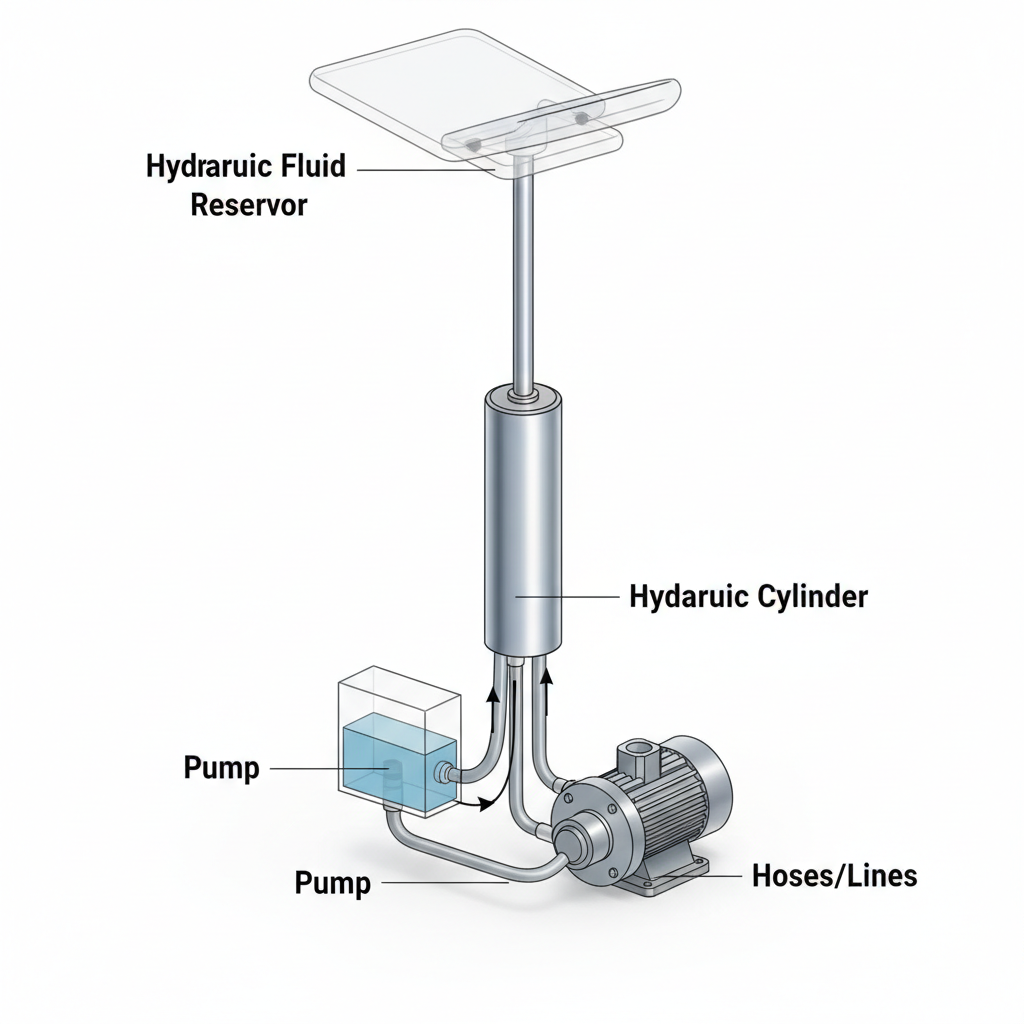
- Look for Leaks: For hydraulic systems, this is critical. Check the floor beneath the chair, the hydraulic lines, and around the cylinder for any signs of oil.
- Inspect Fasteners and Linkages: Manually check that all bolts and screws on the lift mechanism are tight. Look for any bent or disconnected mechanical linkages.
- Clear Obstructions: Ensure there are no objects under the chair that could physically block its movement.
- Check Limit Switches: Locate the upper and lower limit switches. These small but crucial components tell the controller when to stop the motor. Ensure they are not stuck, damaged, or blocked by debris.
Step 3: Component-Level Isolation
If the issue persists, you can begin to test individual components. This is where the troubleshooting paths for hydraulic and electromechanical systems diverge.
Troubleshooting Hydraulic Lift Systems
Hydraulic systems are prized for their smooth operation but are sensitive to fluid integrity. Most problems can be traced to the hydraulic fluid itself or the seals containing it.
1. Problem: The Chair Sinks or Lowers Slowly on Its Own
This is the most common hydraulic issue, almost always caused by a leak in the system.
- Cause: Internal or external fluid leaks. An internal leak happens when a seal inside the hydraulic cylinder fails, allowing fluid to bypass the piston. An external leak is a visible loss of oil.
-
Solution:
- Inspect for External Leaks: Carefully clean the cylinder and all hose connections. Raise the chair and place clean paper underneath it. Leave it for an hour. Any drips will confirm an external leak. Tighten the leaking fitting or replace the hose.
- Check for Internal Leaks: If there are no external leaks, the cylinder seals are likely worn. This typically requires a professional repair or replacement of the hydraulic cylinder.
2. Problem: The Chair is Jerky, Slow, or Won’t Lift a Full Load
This usually points to air in the hydraulic lines or low fluid levels.
- Cause: Air bubbles in the hydraulic fluid are compressible, unlike the fluid itself, which leads to spongy or jerky performance. Low fluid levels can cause the pump to draw in air.
-
Solution: Bleed the System and Check Fluid
- Check the Reservoir: Consult your manual to locate the hydraulic fluid reservoir. Visually inspect the fluid level and top it off only with the manufacturer-specified hydraulic fluid grade. Using the wrong type of fluid can damage seals.
- Bleed the Air: Bleeding procedures vary, but a common method involves cycling the chair. Raise the chair to its maximum height and hold the button for a few seconds. Then lower it to its minimum height and hold the button. Repeat this cycle 4-5 times. This process forces trapped air back into the reservoir where it can escape. Always bleed air at the highest point in the system if a bleed valve is available.
Troubleshooting Electromechanical Lift Systems
Electromechanical systems are robust but rely on a series of electrical and mechanical components working in harmony. Problems here often relate to wear and tear on moving parts.
1. Problem: The Chair Moves Jerkily or Makes Grinding Noises
This suggests a problem with the drive mechanism or the motor itself.
- Cause: Worn motor brushes, debris in the drive screw, or failing bearings.
-
Solution:
- Inspect the Drive Screw: With the power off, inspect the main lift screw. Clean any old lubricant and debris from the threads and re-lubricate according to the manufacturer’s instructions.
- Inspect Motor Brushes: Carbon brushes are wear items in many DC motors. After approximately 5,000 cycles in a high-use clinic, they can wear down, causing poor electrical contact and jerky motor performance. If you are qualified, inspect the brushes for wear and replace them if they are near their wear limit.
2. Problem: The Lift is Completely Unresponsive
If the chair doesn’t move at all and you’ve already completed the universal checklist, the issue likely lies with the controls or the motor controller.
- Cause: A faulty foot pedal, a failed limit switch, a blown fuse on the control board, or a failed motor controller.
-
Solution:
- Test the Controls: If possible, test with a different foot pedal or use the controls on the chair itself to rule out a faulty controller.
- Check Limit Switches Again: Use a multimeter (if you are trained to do so) to test the continuity of the limit switches. A switch that is stuck open will prevent the motor from starting.
- Inspect the Control Board: Visually inspect the main printed circuit board (PCB) for any visible signs of damage, like burn marks or blown capacitors. Manufacturing consistency for these components is a key part of regulations like the FDA 21 CFR Part 820.
Preventive Maintenance for Long-Term Reliability
Proactive maintenance is the most effective way to prevent lift system failures. A well-maintained chair is not just about preventing downtime; it’s about ensuring patient and operator safety. Incorporating these checks into a quarterly routine can dramatically extend the life of your equipment and improve your clinic’s financial health by avoiding costly emergency repairs. For a deeper look at this, consider reading about how chair durability impacts your clinic’s financial health.
Quarterly Maintenance Checklist:
- Inspect and Clean: Clean the chair base and lift mechanism, removing dust and debris.
- Check Hydraulic Fluid: For hydraulic chairs, check the reservoir fluid level and look for any signs of leaks around hoses and fittings.
- Lubricate Mechanical Parts: For electromechanical chairs, lubricate the drive screw and other moving parts as per the service manual.
- Test All Functions: Operate the chair through its full range of motion (lift, tilt, backrest) to ensure smooth operation.
- Check Fasteners: Confirm that all critical fasteners on the base and lift assembly are torqued to the manufacturer’s specification.
- Stock Critical Spares: Keeping a small inventory of essential spares can turn a multi-day outage into a 30-minute fix. I recommend stocking a set of motor brushes, a replacement limit switch, common fuses, and hydraulic filter elements.
Wrapping Up: A Proactive Approach to Chair Uptime
A dental chair lift system is a sophisticated piece of equipment, but most of its common failures can be diagnosed and often resolved with a systematic and simple approach. By starting with universal safety and supply checks before moving to system-specific diagnostics, you can avoid unnecessary downtime and service calls. Understanding the difference between hydraulic and electromechanical systems helps you focus your efforts, whether it’s bleeding air from a hydraulic line or inspecting the motor brushes on an electric drive.
Ultimately, integrating a simple preventive maintenance schedule is the best strategy for ensuring your chair remains a reliable asset rather than a recurring liability. A proactive mindset not only saves money but also ensures your clinic runs smoothly and safely.
Disclaimer: This article is for informational purposes only and is intended for qualified dental technicians and clinic maintenance staff. Always disconnect the dental chair from the power source before performing any inspection or maintenance. For complex repairs, or if you are unsure about any troubleshooting step, contact a certified service professional. The author and publisher are not liable for any damage or injury resulting from the use or misuse of this information.
References
About the Author


