How to Safely Drain Water from Your Dental Compressor Tank

To keep your dental air compressor in good working order, address water buildup. Moisture collects in the tank daily. If not drained, it leads to breakdowns, poor air quality, and costly repairs. Draining condensate is easy once you know how. Here we tell you why water forms and how to drain it safely.
Why Does Your Dental Air Compressor System Produce Condensate?
Your dental air compressor produces water when it is operating. This is what occurs in your system.

Water in Compressed Air
Air has water vapor in it. As you force air into the tank by using your compressor, you are collecting moisture, similar to when you would squeeze a wet sponge; the water must go somewhere.
Temp Changes in Compression
Compression heats air, which gets cold in your tank, causing water vapor to condense. Your dental compressor unit is under a lot of stress, generating heat and cooling cycles daily.
Humidity Levels in Clinical Environment
Dentist offices tend to be more humid due to sterilization equipment and patient procedures. The more humid the air, the more water enters your tank.
Impact on Dental Unit Compressor Performance
Water accumulation impacts everything. Your dental instruments experience unstable air pressure. Moisture can damage sensitive equipment. Your compressor must labor harder, consuming more power and wearing out sooner.
What Are the Risks of Not Draining Your Dental Air Compressor?
Skipping regular drainage creates serious problems that can shut down your practice and cost thousands in repairs. Here are the main risks you face:
- Tank Damage – Water causes rust that weakens tank walls and can lead to dangerous failures requiring complete tank replacement
- Health Hazards – Standing water breeds bacteria and mold that can reach patient areas, creating health risks and violating infection control rules
- Equipment Problems – Contaminated air clogs instruments, damages precision tools, and causes handpieces to fail more frequently
- Higher Costs – Water takes up space meant for compressed air, forcing your compressor to work harder, increasing energy bills and shortening equipment life
How Often to Maintain a Dental Air Compressor?
Regular maintenance prevents costly issues through a simple schedule. Busy dental offices need daily tank draining every evening, with twice-daily draining during humid weather or summer months. Weekly routines include checking air filters, listening for unusual sounds or vibrations, and testing the drainage valve for smooth operation.

Monthly inspections help catch problems early by examining connections, belts, and gauges while recording findings in your maintenance log. Seasonal tasks involve replacing filters, monitoring oil levels in lubricated systems, and scheduling professional inspections twice yearly. Following this maintenance schedule keeps your compressor running efficiently and extends its lifespan.
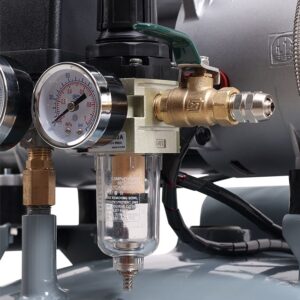
What Is the Safe Condensate Drainage Procedure?
Proper drainage keeps your equipment working well and prevents problems. Here are four simple steps every dental office should know.
Step 1: Safety First
Turn off your dental air compressor and unplug it from the wall. Make sure the pressure gauge shows zero. If there’s still pressure, use the relief valve to let it out. Put on safety glasses and gloves, then place a large container (at least 2 gallons) under the drain valve. Your tank can hold a lot of water, especially if it’s humid or you use the compressor often.
Step 2: Opening the Valve
Find the drain valve at the bottom of your tank. Most valves turn 90 degrees to open (quarter-turn), while others need several turns. Start by turning it just a little to test the water flow – be careful because water might spray out even when the machine is off. If water flows gently, you can open it all the way. Don’t force a stuck valve – you could break it. If it won’t move, stop and call a repair person.
Step 3: Let the Water Drain
Let all the water come out – this takes 5-10 minutes depending on your tank size. You’ll hear the water change from a steady flow to just drips when it’s almost empty. Watch the water as it drains – clear water is good, but rusty, smelly, or oily water means you have tank problems that need professional help. Take your time – if you don’t get all the water out, you’ll have the same problems again.
Step 4: Clean Up and Check
Close the valve firmly but don’t overtighten it. Check for leaks – a few drops is okay, but if it keeps dripping, the valve needs fixing. Clean up any spilled water right away and wipe the valve area to prevent rust. Turn your compressor back on and listen for strange noises. Keep it running at normal pressure like the manual says. Do this every day to keep your compressor running smoothly and avoid expensive repairs.
How Can You Optimize Your Dental Air Compressor Maintenance Routine?
Good record keeping simplifies maintenance and identifies problems early.
Establishing Maintenance Records
Maintain a basic logbook for your compressor. Note drainage dates, water quantities, and any abnormal observations. Electronic logs are fine as well – utilize whatever method your personnel will genuinely use.
Operating with Practice Management Systems
Most dental software programs include modules for equipment maintenance. They can provide automatic reminders for drainage and other maintenance procedures.
Staff Training Requirements
Train multiple personnel on drainage practices. Don’t rely on a single person. Practical training and written procedures prevent mistakes.
Professional Service Scheduling
Arrange for professional maintenance every six months or once a year. Trained technicians identify issues that routine drainage cannot. They can also revise your maintenance routines as your equipment gets older.
Dental Air Compressor Maintenance: FAQs
Q1: Can Automatic Drain Valves Eliminate Manual Drainage Completely?
A: Automatic valves help significantly with dental air compressor maintenance, but manual inspection remains important. These devices can fail or clog, allowing water buildup. Check automatic drains weekly and perform manual drainage monthly to ensure proper operation and catch any system issues early.
Q2: What Does Rusty Water Upon Drainage Indicate for My Dental Compressor?
A: Rusty water indicates corrosion within your tank. Some rust may be acceptable in older models, but more rust indicates it is worsening. You should have a professional inspect it immediately, because extensive corrosion can lead to tank failure, and you could have to replace the entire dental air compressor.
Q3: Do I Need to Drain My Dental Air Compressor If I Don’t Use It for Several Days?
A: Yes, you should drain it after it is not being used. Water condenses from the remaining air even when turned off, which can create more bacterial growth and more corrosion than if it is being utilized.
Make Draining Your Tank Daily a Habit
Proper drainage keeps your investment safe and your dental air compressor functioning properly. Draining it daily only takes a few minutes and will save you money on repairs and downtime. Make draining your tank daily a habit, keep a record, and have it inspected regularly. Your dental unit and budget will thank you down the road.
About the Author


