Upholstery Care: Balancing Infection Control & Durability

Harsh disinfectants are essential for infection control, but they can significantly degrade dental chair upholstery over time, leading to cracks, discoloration, and material failure. This creates a frustrating cycle where the tools used to ensure patient safety compromise the longevity and appearance of expensive equipment. The key isnt to abandon rigorous disinfection, but to adopt a smarter, material-conscious approach. This article provides a practical framework for effective infection control that also preserves the integrity and durability of your dental chairs, protecting your investment for the long term.
The Foundation: A Preventative-First Upholstery Care Strategy
The most effective way to protect your dental chair upholstery is to minimize its direct contact with harsh chemicals from the outset. A preventative strategy based on physical barriers and gentle daily cleaning is the cornerstone of long-term durability.
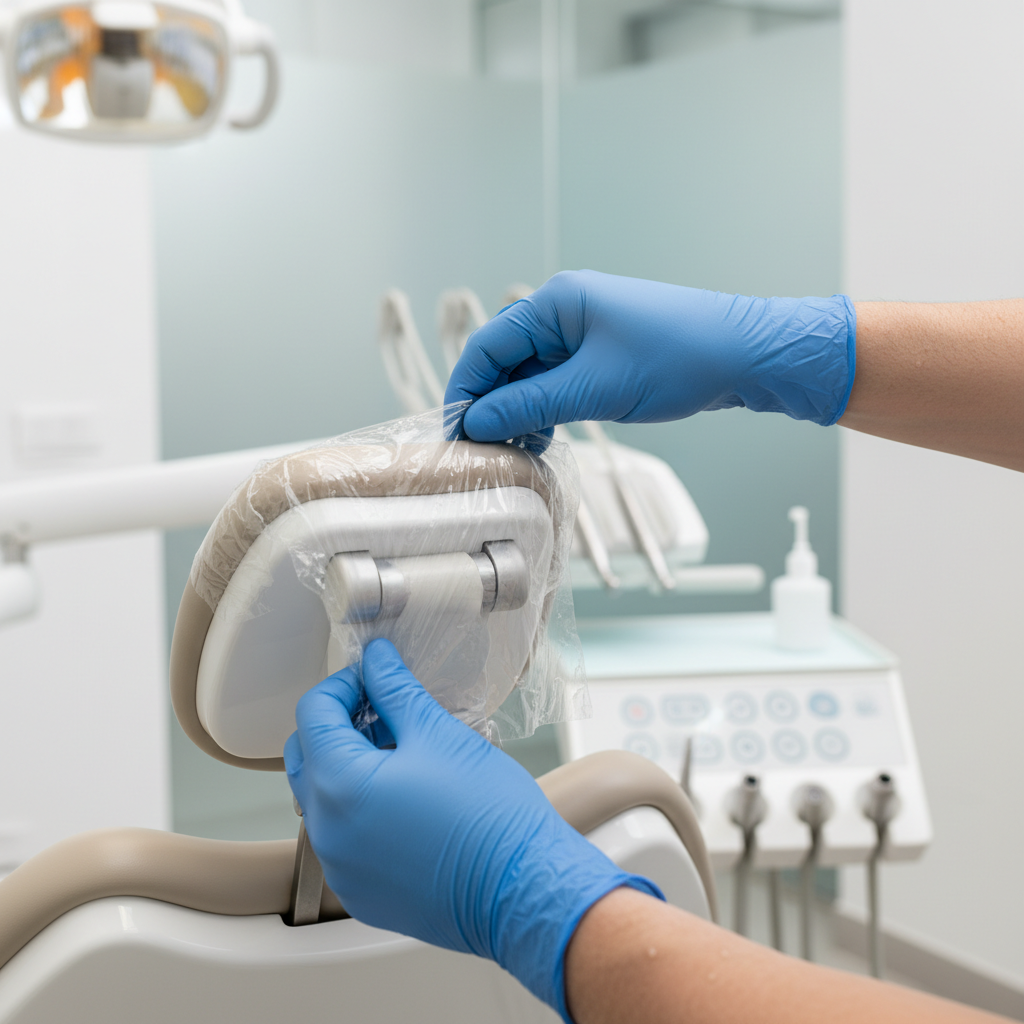
The First Line of Defense: Barrier Protection
Before any patient sits in the chair, your first step should be applying single-use barrier film to high-touch surfaces. This includes the headrest, armrests, and control panels. I have found this to be the single most effective tactic in extending upholstery life. It acts as a shield, absorbing the brunt of chemical exposure from disinfectants used between appointments.
This simple, low-cost habit provides a significant return on investment. By reducing the frequency and volume of potent chemicals applied directly to the vinyl, you are actively preventing the slow, cumulative damage that leads to brittleness and cracking. For a deeper look into material preservation, our guide on Maximizing Durability in Dental Chair Upholstery offers additional insights.
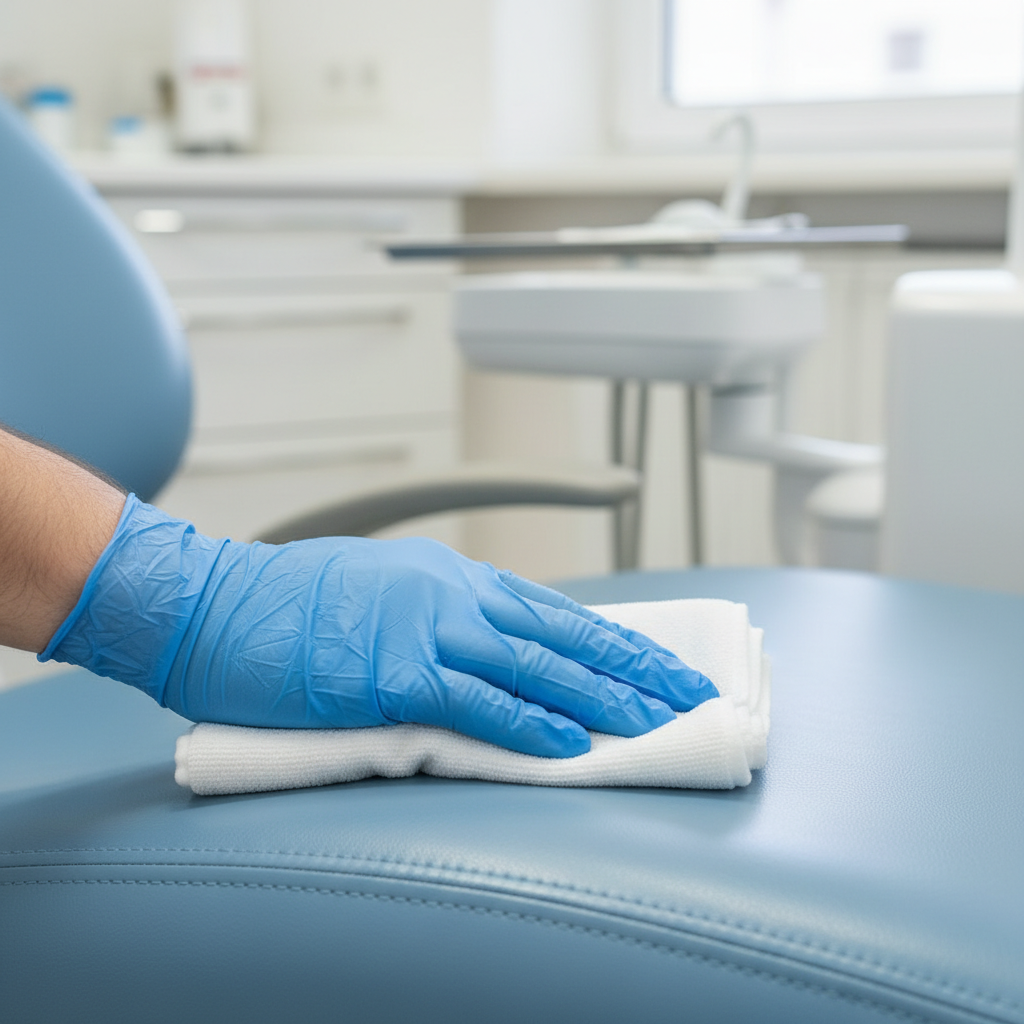
Daily Cleaning Protocol: The Gentle Approach
For end-of-day cleaning or removing minor, non-biohazard soil, aggressive chemicals are unnecessary and counterproductive. My experience in clinics has consistently shown that a pH-neutral detergent (typically in the 6-8 pH range) mixed with lukewarm water is sufficient for routine cleaning.
Always use a soft, non-abrasive microfiber cloth. Abrasive pads or harsh scrubbing motions can create micro-scratches on the upholstery’s protective topcoat, which can trap dirt and eventually lead to material failure. After wiping with the detergent solution, rinse with a separate cloth dampened with clean water to remove any residue, and then dry the surface completely. This prevents chemical buildup and water spots.
Debunking a Common Myth: “Stronger Is Always Better”
A pervasive myth in clinical settings is that using the most potent disinfectant for every cleaning task ensures the highest level of safety. While well-intentioned, this approach is flawed and ultimately damaging to your equipment.
In reality, the overuse of high-alcohol solvents or bleach-based solutions for routine cleaning accelerates the degradation of vinyl and polyurethane upholstery. These chemicals strip the plasticizers that keep the material flexible, leading to premature hardening, discoloration, and cracking. True compliance and safety, as outlined in quality management standards like ISO 13485:2016, involve maintaining the device’s integrity throughout its intended lifecycle. A risk-based approach to cleaning—using the appropriate level of disinfectant for the specific task—is a core component of this principle.
A Risk-Based Guide to Disinfection
Intelligent disinfection involves matching the cleaning agent to the level of contamination risk. This targeted approach ensures compliance with health regulations without needlessly exposing the upholstery to harsh chemicals. It’s a methodology I’ve implemented that balances safety with asset preservation.
Matching Cleaner to Contamination Level
Not all cleaning events are equal. I recommend structuring your protocol around a clear, three-tiered system. This eliminates guesswork and empowers your team to make the right choice every time.
| Contamination Level | Description & Examples | Recommended Action | Chemical Choice |
|---|---|---|---|
| Routine Cleaning | No visible soil or contamination. End-of-day general wipe-down. | Gentle cleaning to remove dust and oils. | pH-neutral detergent and water. |
| Low-to-Intermediate | Visible splatter from saliva or aerosols; no visible blood. | Surface disinfection after barrier removal. | EPA-registered, low-alcohol or quaternary ammonium disinfectant. |
| Gross Contamination | Visible blood or other potentially infectious materials (OPIM). | Decontamination and high-level disinfection. | Dilute bleach solution (e.g., 1:100 or 1:10) followed by a water rinse. |
The Critical Importance of the Patch Test
Before introducing any new disinfectant into your clinic’s routine, you must perform a patch test. I cannot overstate this. I once saw a clinic ruin a brand-new chair because they switched to a new disinfectant that was incompatible with the upholstery, causing widespread discoloration within a week.
Apply a small amount of the chemical to an inconspicuous area, such as the underside of the leg rest or the back of the chair base. Let it sit for 24–48 hours and observe for any signs of damage, such as fading, tackiness, or swelling. This simple, one-time check can save you thousands of dollars in reupholstery costs.
Following Regulatory Guidelines
Always ensure your chosen disinfectants and procedures align with regulatory expectations. The EU Medical Device Regulation (MDR) and the FDA’s Quality System Regulation (21 CFR Part 820) both emphasize that manufacturers must provide clear instructions for cleaning and disinfection. Adhering to these instructions is not just a best practice; it is a compliance requirement that ensures the device performs as intended.
A Proactive Maintenance and Inspection Schedule
Durability is not a passive quality; it is maintained through consistent, proactive inspection. Tracking wear and tear allows you to address minor issues before they become critical failures, which is fundamental to maximizing the long-term ROI of your equipment.
The Power of a Simple Maintenance Log
I advise every clinic to keep a maintenance log for each chair. This doesn’t need to be complex—a simple digital spreadsheet or a physical logbook will suffice. Record daily cleanings, weekly spot checks, and any observed signs of wear. This log creates a historical record that helps you identify recurring issues, track the material’s performance over time, and plan for eventual replacement, thus positively impacting your clinic’s financial health.
A Practical Inspection Checklist
Systematic inspection turns maintenance from a chore into a strategic practice. Here is a simple yet effective schedule to follow:
| Frequency | Task | What to Look For | Action if Found |
|---|---|---|---|
| Daily | Visual Sweep & Wipe-Down | Debris, obvious spills, or soil. | Clean immediately using the appropriate agent. |
| Weekly | Spot Audit | Early-stage stains, minor scuffs. | Address with targeted cleaning; consult our guide on stain-resistant upholstery. |
| Monthly | Seam & Edge Check | Seam separation (especially >5 mm), fraying, or lifting at the edges. | Schedule a minor repair to prevent fluid ingress. |
| Semi-Annually | Full Integrity Inspection | Hardening, brittleness, cracking, or areas where foam is exposed. | Schedule for professional repair or reupholstery. |
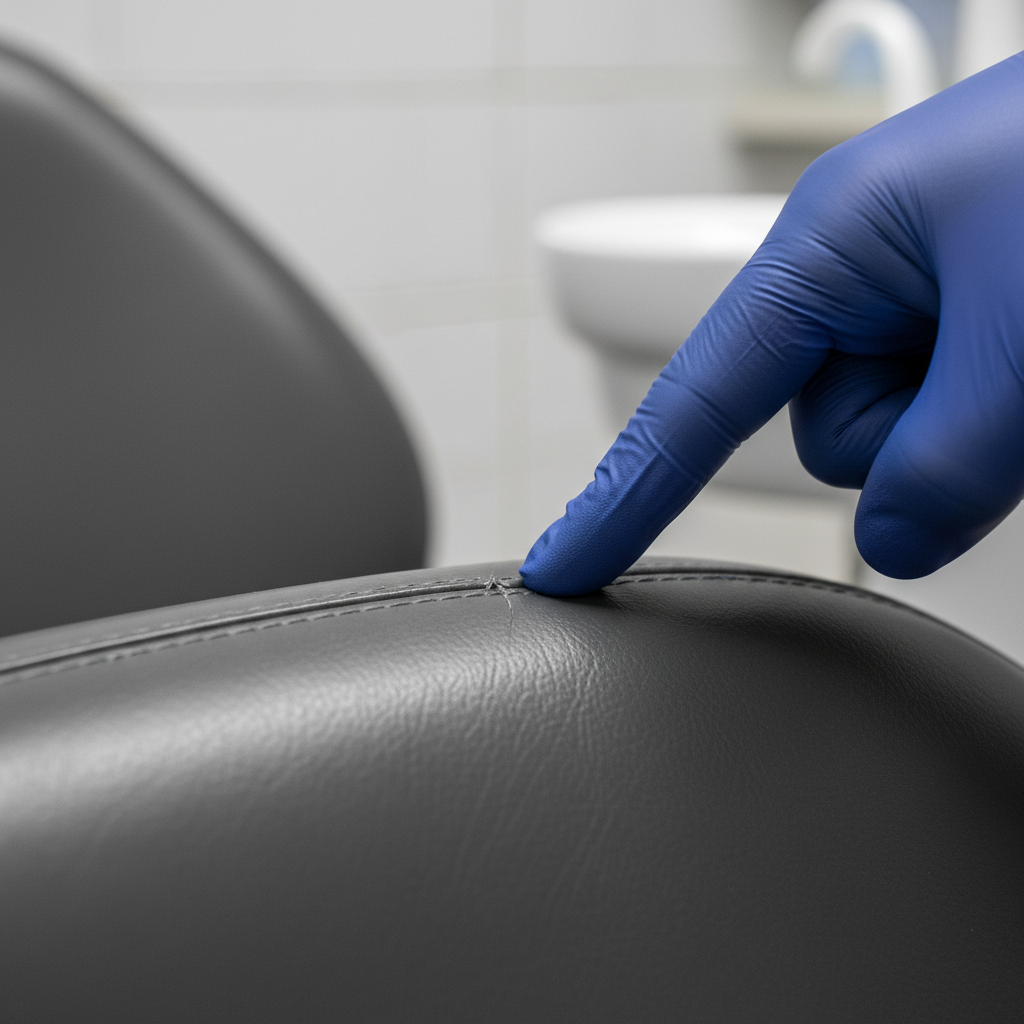
Small Repairs, Big Impact
For small nicks or seam separations, immediate action is crucial. Keeping a small, color-matched vinyl repair kit on hand is a practice I’ve seen pay dividends. These kits typically contain a specialized adhesive and sometimes a small patch of material. Sealing a small tear immediately prevents fluids from penetrating the underlying foam cushion. Once the foam is contaminated with moisture and bacteria, it becomes a significant infection control risk and is far more difficult and expensive to remediate than a simple surface repair.
Wrapping Up: A Strategy for Durability and Safety
Balancing stringent infection control with the preservation of your dental chair upholstery is not only possible but essential for the operational and financial health of a modern dental practice. By shifting from a reactive to a proactive mindset, you can extend the life of your equipment significantly.
The key takeaways are straightforward and actionable:
- Prioritize Prevention: Use barrier films as your first line of defense to minimize direct chemical contact.
- Clean Gently: Reserve harsh chemicals for disinfection and use pH-neutral detergents for daily cleaning.
- Disinfect Intelligently: Adopt a risk-based approach, matching the disinfectant to the level of contamination.
- Inspect Systematically: Follow a regular schedule of inspection to catch and repair minor wear before it becomes a major failure.
By implementing these practices, you create a sustainable system that upholds the highest standards of safety while protecting the long-term value of your critical assets.
Disclaimer
This article is for informational purposes only and does not constitute professional medical or regulatory advice. Always follow the specific cleaning and maintenance instructions provided by your dental chair manufacturer and disinfectant supplier. Consult with infection control experts to ensure your clinic’s protocols comply with all local, state, and federal regulations.
References
About the Author


