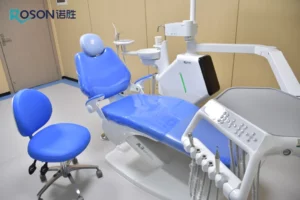
Guide to Daily Dental Chair Cleaning: Morning Startup to Evening Shutdown

Good dental chair cleaning protects your patients and your practice. Good dental chair cleaning keeps infection at bay, equipment lasts longer, and patients stay loyal. This guide walks you through every step, from morning startup to night shutdown, so you can maintain the highest standards of dental infection control every day.
Why Cleaning Dental Chairs Every Day Is Important?
Your dental chair is extremely significant in patient care. It can also be a breeding ground for bacteria and viruses. If you don’t practice good infection control protocols, you are endangering your patients and putting your practice at risk.
Surfaces become coated daily with saliva, blood, and small droplets from dentistry. Germs can spread within a few seconds if cleaning procedures are neglected. The CDC and ADA have stringent regulations for dental chair cleaning due to this.
Regular cleaning prevents costly repairs and lengthens your chair’s life. It demonstrates care for patients’ health, fostering loyalty and referrals.
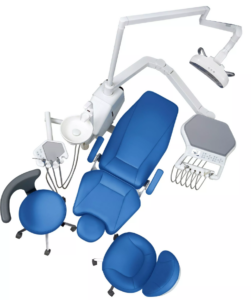
What Chemicals and Tools Do You Require For Dental Chair Cleaning?
It is imperative to get cleaning products right. Incorrect products ruin costly equipment. Correct ones safeguard patients as well as your investment.
1. Basic Cleaning Equipment
Microfiber cloths, soft brushes, and barrier films should be part of your toolkit. Cleaning the dental chair requires personal protective equipment. Use gloves, masks, and eye protection.
Use separate receptacles for clean and dirty supplies. Color-coding prevents contamination mix-up.
2. EPA-Registered Medical Cleaners
Use EPA-registered disinfectants that are compatible with your chair materials. Select products designed for dental equipment that are label-claimed to kill bacteria, viruses, and fungi.
Some common ones are phenolic compounds, quaternary ammonium compounds, and accelerated hydrogen peroxide. All have varying contact times and are compatible with various materials. Read labels carefully.

3. Cleaning Blacklist Products to Avoid
Do not use high-percent alcohol (above 70%), chlorine bleach, and harsh cleaners. They will damage vinyl, discolor, and harm plastics.
Harsh cleaners and abrasive scrubbing pads can scratch surfaces. This provides bacteria with places to hide. Refer to your chair maker’s instructions before introducing any new product.
How to Prepare Your Dental Chair Each Morning
Your morning patient dental chair cleaning routine sets the tone for the day.
- First, turn on the main power and water switches to energize systems and reveal overnight issues.
- Flush the lines for at least two minutes. This eliminates standing water in which bacteria breed. If you have your own water source, have it checked. Replace filters and refill bottles as required.
- Wipe down all surfaces with your disinfectant, including controls, armrests, and headrests. Apply new barrier films to surfaces that come in contact with patients or surfaces that can become soiled.
- Test all features – chair movement, water pressure, suction power, and light function. Identify problems now, not when you are treating patients.
What Is the Critical Period for Patient-to-Patient Control of Dental Infections?
The time between patients is also important for dental infection control, preventing cross-contamination that could harm the next patient.
Dispose of all barrier films; they are for single use only. Wipe surfaces with EPA-registered disinfectant, following label contact time.
Clean and disinfect the suction system. Run disinfectant through the lines. Replace tips and traps. Flush water lines for 30 seconds between patients to clear contamination. This reflects the importance of having a better dental suction system for less cross-infection.
Do not hurry. Shortcuts can injure patients and violate infection control guidelines. The time you take to extra protect everyone in your practice.
How to Properly Shut Down Your Dental Chair Each Night
Evening shutdown is not simply a cleaning of the dental chair. It’s valuable maintenance that ensures your equipment continues to function properly. This addresses areas that are not cleaned throughout the day.
- Run disinfectant through suction lines for extended contact. Some do this overnight for the best results. Drain and clean all filters. Replace them on the manufacturers’ schedules.
- Wipe down all surfaces thoroughly. Don’t forget to wipe under the chair and the back of the panels. Check for wear, damage, or loose components that should be repaired.
- Flush water lines one last time. Turn off power and water supplies. Leave some chairs’ water bottles empty overnight to prevent bacteria.
- Document cleaning in your system for accountability and tracking maintenance patterns.
3 FAQs About Routine Dental Chair Cleaning
Q1. How Frequently Do I Need to Change Microfiber Cloths Used to Clean Dental Chairs?
Change microfiber cloths after every use or when they appear dirty. Using the same cloth on various surfaces can spread germs rather than prevent them. Have separate clothes for separate areas. Use one for chair surfaces and one for equipment controls. Never combine cleaning cloths with disinfecting cloths. Reusable cloths should be washed in hot water using the appropriate detergent. Consider using disposable cloths in high-risk areas to eliminate the spreading of germs altogether.
Q2. What Should I Do If My EPA-Registered Disinfectant Leaves Residue on Chair Surfaces?
If your EPA-registered disinfectant is leaving residue, you’re using too much or not allowing it to dry long enough. Follow label instructions closely; more is not always better. Wipe surfaces with a damp cloth after contact time to remove excess. Some require rinsing, others air dry. Consult your chair’s compatibility list, as some materials may respond poorly to certain chemicals.
Q3. What’s the Biggest Mistake Practices Make with Daily Dental Chair Cleaning?
The worst error in the daily cleaning of dental chairs is not allowing disinfectants sufficient contact time. Employees tend to spray and wipe in a hurry, so germs are not killed appropriately. Every disinfectant requires 1-10 minutes of contact time as indicated on the label for optimal infection control. Another error is wiping various surfaces with the same cloth, thereby transferring germs rather than eliminating them.
Making Daily Routines a Habit
Reliable dental chair cleaning routines don’t occur by chance. They take dedication and systems. Practices that excel in infection control render these procedures second nature through training, documentation, and accountability.
Patients trust you with their health when they sit in your chair. This trust comes from your commitment to cleaning the dental chair and controlling infections. Following protocols carefully and not taking shortcuts protects their health.
Ready to enhance infection control? Establish daily dental chair for dentist cleaning protocols tomorrow. Your patients, staff, and practice reputation rely on this daily.
About the Author


