Cost-Effective Dental Chair Integration Strategies

Introduction
Setting up a new operatory doesn’t have to break the bank. This guide focuses on affordable and practical ways to integrate a new dental chair, maximizing value without compromising on quality or efficiency. The key isn’t just finding the lowest price, but making intelligent choices that enhance workflow, ensure long-term reliability, and maintain strict safety standards. A well-chosen and properly installed chair becomes the foundation of an efficient and profitable practice.
This article provides a blueprint for cost-effective integration, covering everything from spatial planning and utility placement to maintenance strategies that prevent costly downtime. We will explore how to look beyond the initial purchase price to evaluate the total cost of ownership, ensuring your investment serves you well for years to come.
Foundational Planning: Beyond the Price Tag
True cost-effectiveness is measured over the lifespan of the equipment, not by its initial price tag. A cheap chair that requires frequent repairs or fails to meet regulatory standards can quickly become a financial drain and a clinical liability. Smart planning begins with a holistic view of value.
Debunking the “Cheapest is Best” Myth
A common misconception is that the most affordable dental chair is the one with the lowest upfront cost. In reality, this approach often leads to higher expenses down the line. The total cost of ownership (TCO) includes the purchase price plus all associated costs for maintenance, spare parts, and potential downtime. A chair with a slightly higher initial cost but superior durability and easily sourced components often presents a far better return on investment.
For clinics in regions with potential supply-chain limitations, standardizing on common parts is a crucial strategy. Documenting part numbers and identifying local equivalents can drastically reduce downtime, turning a potential multi-day shutdown into a quick fix. An effective practice maintains a small inventory of critical spare parts, such as fuses, foot-control diaphragms, and upholstery clips, to handle minor issues in-house.
The Critical Role of Compliance and Certification
Compliance is not an area for compromise. Adherence to recognized quality and safety standards is essential for protecting your patients, your staff, and your practice. When evaluating affordable dental chairs, verification of certification is a non-negotiable step.
Key standards to look for include:
- ISO 13485:2016: This standard specifies requirements for a quality management system where an organization needs to demonstrate its ability to provide medical devices that consistently meet customer and applicable regulatory requirements. A chair manufactured under this standard comes from a system focused on quality and safety.
- CE Marking: For practices within the European Union, the CE mark is mandatory. It signifies that the product has been assessed to meet high safety, health, and environmental protection requirements. According to the European Commission, it is a declaration that the product meets the requirements of the applicable EU directives.
- FDA Regulations: In the United States, the Food and Drug Administration (FDA) governs medical devices. Equipment must comply with regulations like the Quality System Regulation (21 CFR Part 820), which ensures that medical devices are manufactured with consistent quality controls.
Choosing a certified chair ensures it has been rigorously tested for electrical safety, mechanical stability, and biocompatible materials, providing a foundation of trust and reliability.
Smart Operatory Design: A Blueprint for Efficiency
An efficient operatory is more than just a room with a chair; it’s a carefully planned environment that optimizes movement for the clinical team and ensures comfort for the patient. The placement of the dental chair is the cornerstone of this design.
Mastering Spatial Layout and Workflow
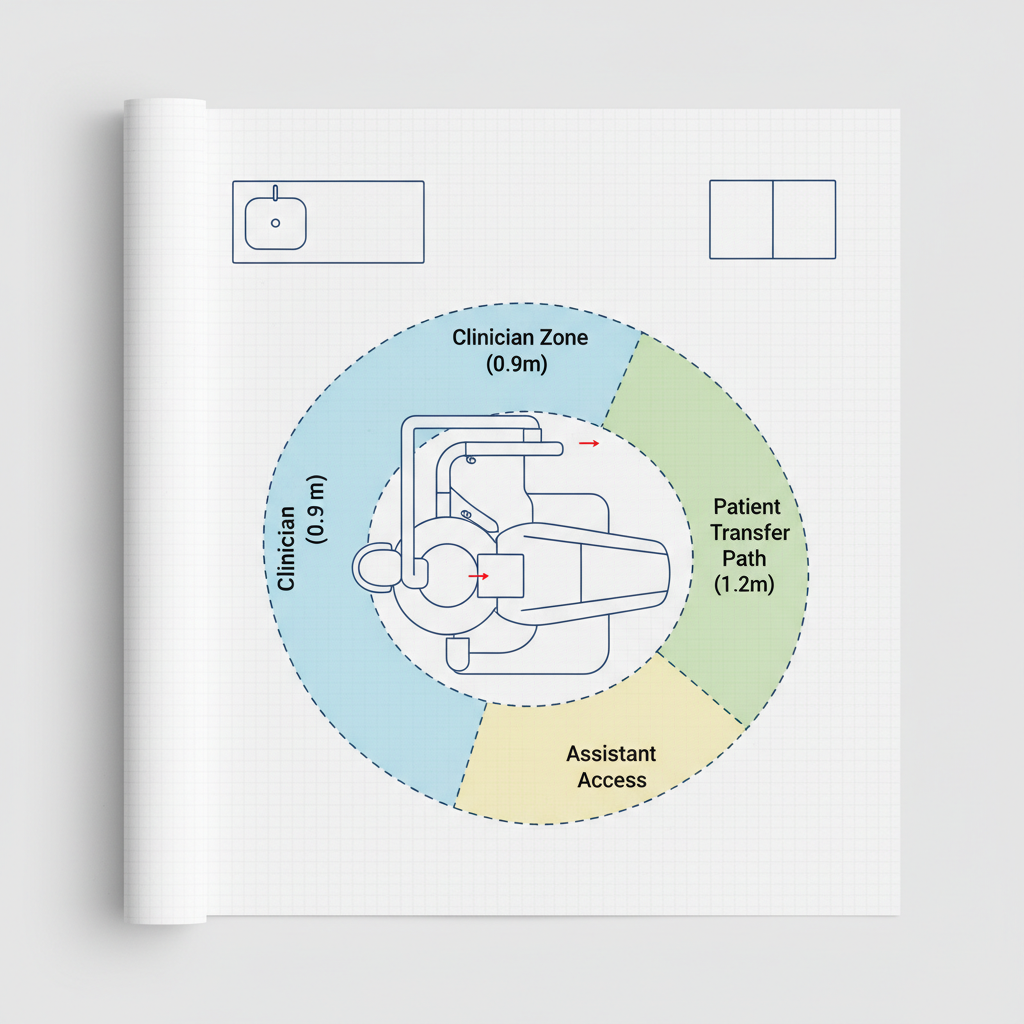
One of the most common and costly mistakes in operatory design is underestimating the need for adequate clearance around the dental chair. A cramped space hinders movement, creates safety risks, and reduces clinical efficiency. I’ve seen many clinics struggle with patient transfers simply because they didn’t account for wheelchair or stretcher access.
A practical approach involves mapping out zones for different activities. The following table provides a reliable framework based on real-world clinical experience.
| Clearance Zone | Minimum Recommended Distance | Purpose |
|---|---|---|
| Patient Transfer Path | 1.2 m – 1.5 m | Allows for safe and unobstructed access for wheelchairs or stretchers. This path should be kept clear at all times. |
| Clinician Movement (Sides) | 0.6 m – 0.9 m | Provides adequate space for the dentist and assistant to move and work comfortably without feeling constrained. |
| Rear Service Access | 1.0 m – 1.2 m | Critical for patient transfer behind the chair and gives technicians access for maintenance and repairs without disrupting the entire operatory. |
Always measure your space and draw a simple floor plan before installation. This simple step can prevent significant workflow issues later.
Ergonomics for Clinician and Patient
Poor ergonomics is a leading cause of musculoskeletal strain and burnout among dental professionals. A cost-effective chair must also be an ergonomic one. The real “aha!” moment for many clinicians is when they realize that small, consistent adjustments can eliminate chronic end-of-day neck and back pain.
Look for chairs with a practical adjustment range. For instance, a seat height range of approximately 40–55 cm accommodates most patients and allows clinicians to maintain a neutral, supported posture. Likewise, a headrest with 10–15 cm of vertical adjustment is crucial for comfortably positioning patients for various procedures, especially in a supine position. These features are not luxuries; they are essential for career longevity and procedural precision.
Utility and Maintenance: The Keys to Longevity
Proper utility placement and a proactive maintenance routine are the final pieces of the cost-effective integration puzzle. These elements are often overlooked during the initial setup but are vital for the chair’s long-term performance and reliability.
Strategic Utility Placement
The goal of utility placement is to provide power, water, and air efficiently and safely. Long, trailing hoses are not only a tripping hazard but can also cause a pressure drop in air-driven instruments, affecting their performance. A simple rule is to locate compressed air and electrical outlets within 0.5–1.0 meters of the chair’s utility box. Whenever possible, routing water and waste lines directly through conduits in the floor or inside the chair’s base cavity creates a cleaner, safer, and more professional environment that is far easier to sanitize.
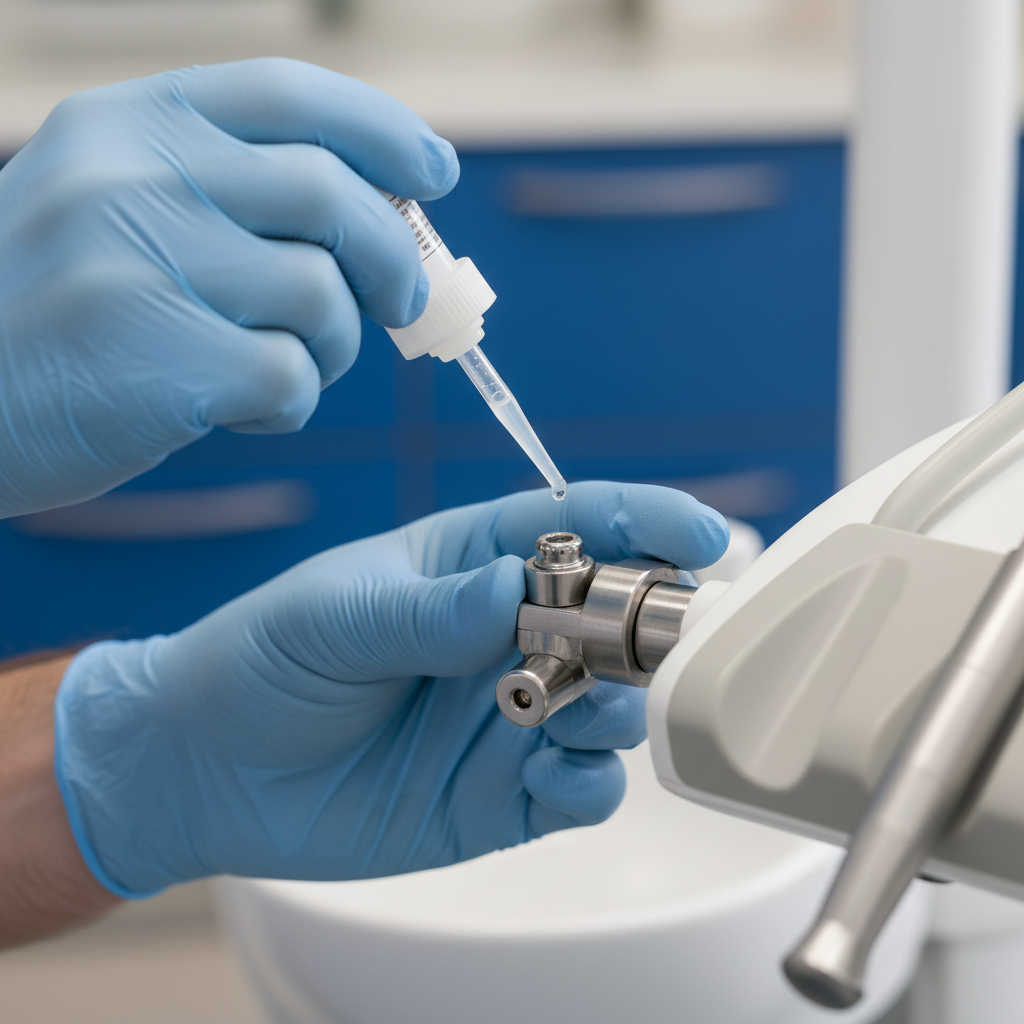
A Practical Maintenance Framework
Waiting for something to break is not a strategy; it’s a liability. A simple, consistent maintenance schedule is one of the most effective ways to maximize the life of your dental chair and prevent unexpected downtime. This doesn’t require hours of work—just a disciplined routine.
Here is a simple yet effective maintenance checklist:
-
Daily (5 Minutes):
- Wipe down all upholstery and surfaces with a recommended dental-grade disinfectant.
- Visually inspect hoses and cords for any signs of wear or damage.
- Run water through all lines (handpieces, syringes) for 30 seconds to flush them.
-
Weekly (15 Minutes):
- Lubricate all moving joints and pivot points as specified by the manufacturer.
- Check and clean suction filters and traps.
- Test the function of all chair controls, including the foot pedal and seat adjustments.
This proactive approach, combined with a small, on-site kit of spare parts, empowers your team to handle minor issues instantly and keep the operatory running smoothly.
Key Takeaways for Smart Investment
Integrating a new dental chair on a budget is a matter of smart strategy, not just bargain hunting. By focusing on the total cost of ownership, prioritizing certified and compliant equipment, and dedicating resources to intelligent layout and proactive maintenance, you can build an operatory that is both affordable and highly efficient. A dental chair is a long-term investment in your practice’s productivity and reputation. Making a well-informed decision will yield returns in reliability, safety, and clinical excellence for years to come.
Frequently Asked Questions (FAQ)
What is the most common mistake when installing a new dental chair?
The most frequent and disruptive mistake is poor spatial planning. Many practices underestimate the clearance needed for efficient workflow, patient transfers, and service access. Failing to leave at least 1.2–1.5 meters for a clear wheelchair or stretcher path is a critical oversight that can compromise safety and accessibility.
How much clearance do I really need around a dental chair?
As a practical rule, aim for 1.0–1.2 meters of clearance behind the chair for safe patient transfers and service access, 0.6–0.9 meters on the sides for clinician movement, and a completely unobstructed path of at least 1.2 meters for stretcher or wheelchair access.
Are certified pre-owned chairs a good cost-effective option?
Yes, a certified pre-owned chair can be an excellent value, provided it meets several key criteria. Ensure it comes from a reputable dealer, includes a warranty, and has a documented service history. Most importantly, it must still meet current compliance standards for your region, such as CE or FDA requirements. Without this verification, the initial savings could be lost to compliance failures.
Disclaimer: This article is for informational purposes only and does not constitute professional medical, legal, or financial advice. The installation and operation of dental equipment should always be performed in consultation with qualified equipment specialists and in accordance with all local, state, and federal regulations.
References
About the Author


